
Quality, fresh seafood laid perfectly over a bed of sushi rice… yeah, this is my happy place. It’s hard to beat the simplicity and elegance of a well-made chirashi-don (or kaisen-don), especially when the fish is super fresh.
Below, I’ll show you how to make this bowl of heaven at home, along with breaking down the different types of chirashi sushi so you know exactly what you’re working with.
🍣What is Chirashi Sushi?
Chirashi sushi (technically pronounced “chirashizushi”) translates to “scattered sushi,” and it’s exactly what it sounds like, with toppings placed or scattered over a bed of sushi rice. Simple idea, but there are actually a few different styles depending on where you are in Japan.
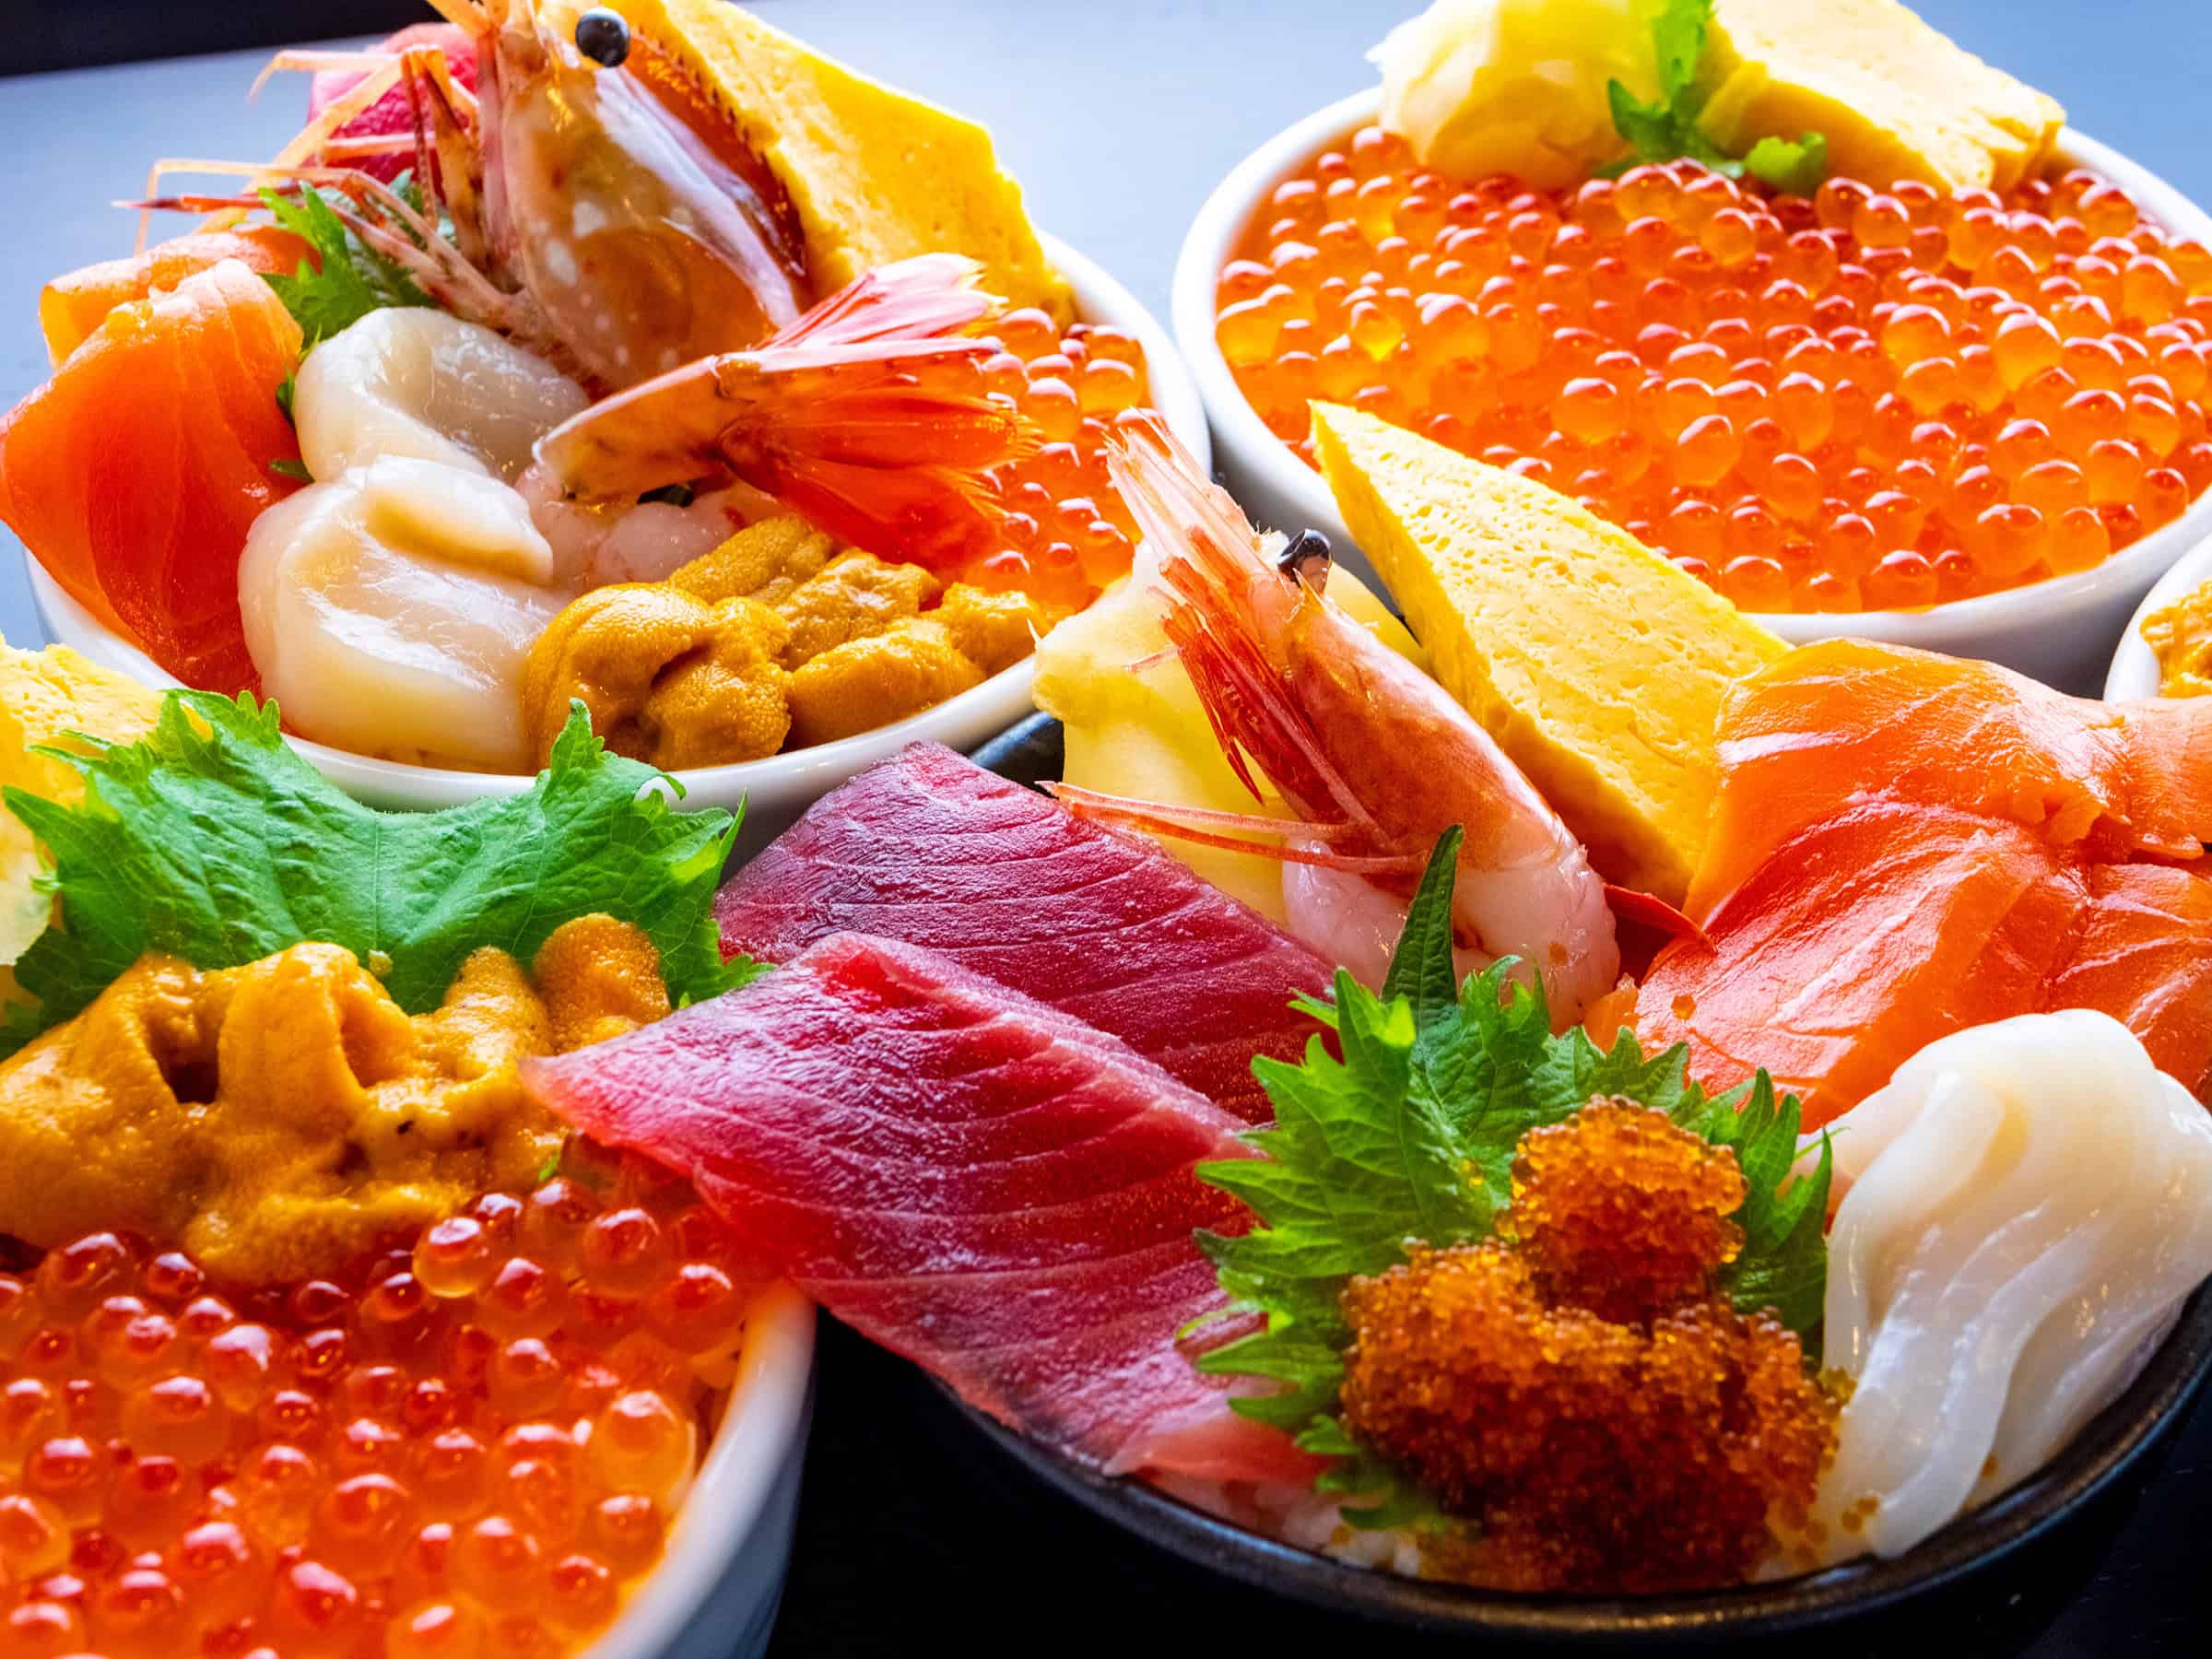
In the Tokyo area, it’s typically a bowl of sushi rice layered with an assortment of colorful sashimi and vegetables. This version is often called chirashi-don (“don” is short for donburi, meaning bowl), and it’s probably the one you’ll see most often at restaurants in the United States. If you swap the sushi rice for regular rice, that’s called kaisen-don, which basically means “seafood bowl.”

Head over to the Kansai region (around Osaka), and things start to look a little different. There, chirashi is known as barazushi. Instead of neatly layered slices of sashimi, it’s mixed with more vegetables and smaller pieces of cooked seafood, sometimes with a bit of raw fish. Same concept, just a different approach.
And just to keep things interesting, different regions in Japan have their own variations and names for it… so yeah, it can get a little confusing.
No matter the style, chirashi is often considered a festive dish and is commonly enjoyed during celebrations, especially on March 3rd for Hinamatsuri (Girl’s Day). It's usually served in a large bowl or a traditional wooden sushi oke (hangiri), which makes it perfect for sharing at parties or potlucks.
🍚Chirashi Don vs Kaisen Don
This is where a lot of people get tripped up. They look almost identical, but there is a difference.
- Chirashi-don - made with sushi rice (seasoned with vinegar)
- Kaisen-don - made with plain rice
That’s really the main distinction.
Everything else (toppings, presentation, fish) can overlap. Some places even blur the lines depending on how they prepare it, so don’t stress too much about getting the terminology perfect. Just focus on whether you want sushi rice or not.
❤️Why You’ll Love It
If you like sushi but don’t feel like rolling anything… this is your move.
- No rolling
- No shaping
- No stress
It’s basically the “lazy” version of sushi, but somehow still looks like you know what you’re doing. And honestly, it might be the best way to enjoy high-quality fish at home. You get bigger cuts, more variety, and way more flexibility.
🐟Ingredients (Flexible on Purpose)
This is one of those dishes where you can keep it simple or go all out.
Base
- Sushi rice (or regular rice for kaisen-don)
Seafood (mix and match)
- Salmon
- Tuna
- Yellowtail
- Scallops
- Shrimp
- Ikura (salmon roe)
- Masago (smelt roe)
- Whatever looks fresh at the market
Chirashi typically uses a variety of seafood depending on availability and preference, so don’t feel locked into anything specific.
Extras
- Tamago (Japanese omelet)
- Avocado
- Cucumber
- Pickled ginger
- Nori
- Sesame seeds
🧑🍳How to Make Chirashi-don
1. Make your rice
Prepare sushi rice and let it cool slightly. You want it room temp, not hot. Check out my sushi rice tutorial if you want to learn how to make this properly.
2. Prep your toppings
Slice your fish into sashimi-sized pieces. Not too thick, not too thin, somewhere in that “this looks like a restaurant” zone.
3. Build your bowl
Add your rice to a bowl, then layer or arrange your toppings however you like. There’s really no strict rule here. You can keep it clean and organized, go more scattered and casual, or land somewhere in between. It’s all fair game.
4. Finish it off
Add your garnishes (sesame seeds, wasabi, ginger, etc.) and dig in!
🍽️Plating Tips
- Tsuma (shredded daikon should be in the background and can be used to stand ingredients up.
- Shiso leaves add a lot of color and contrast and can be used as dividers between different fish. But don’t overdo it; you don’t want your chirashi-don to look like a salad.
- Slices of cucumber can also be used for garnish and a divider. They can also add some good texture to the bowl.
- Taller ingredients (as well as bold-colored fish) should be laid toward the back.
- You can add wasabi and ginger to the bowl or leave it on the side. Soy sauce should always be on the side.
- Remember, don’t overdo it. Elegance is key.
✍️Final Thoughts
That’s really all there is to it.
Chirashi-don is one of the easiest ways to make sushi at home without overcomplicating things. Focus on good rice, fresh ingredients, and just have fun with it!
Chirashi-don / Kaisen-don (Seafood Bowl)

INGREDIENTS
Tools/Supplies:
- Cutting board
- Knife
- Clean damp towel
- Serving bowl
- Bowl for cold water or tezu rice vinegar water - optional
- Moribashi garnishing chopsticks - optional
Ingredients:
- 1 piece amaebi sweet shrimp with head (see step 1)
- 1½ –2 cups cooked sushi rice unseasoned rice if making kaisen-don
- 1 tablespoon tsuma shredded daikon radish
- 1 –2 shiso leaf
- 3 slices sashimi cut maguro tuna
- 3 slices sashimi cut sake salmon
- 3 slices sashimi cut hamachi yellowtail
- 2 slices sashimi cut tako octopus
- 3 –5 pieces uni sea urchin
- 1 tablespoon ikura salmon roe
- Wasabi
- Gari pickled ginger
- Soy sauce
INSTRUCTIONS
Sushi Rice
- First step is to start making sushi rice or just white rice if making kaisen-don. While the rice cooks, you can move on to prepping the toppings. Making sushi rice will take approximately 1 hour and 10 minutes. Make the Perfect Sushi Rice
Preparing Seafood
- Depending on how you purchased your seafood you may be ready to skip to plating. If you need to slice the fish into sashimi pieces then follow my How to Cut Sashimi post here.
Plating
- For this recipe, the amaebi is peeled with the head still intact. To do this, simply peel the shell starting right under the head and work your way to the tail, but leave the tail on.

- Using your hands or a shamoji (rice paddle), place sushi rice in the bowl and gently flatten the top.
- Place the tsuma first. This is a garnish and should be placed in the background; it also helps stand the ingredients up.
- Next, lay the shiso leaf on top of the tsuma. The bright color of the shiso leaf makes for great contrast but shouldn’t be the focal point. Lay these under a bright-colored fish and have the top partially sticking out.
- I lay the amaebi right in the middle since we only have one piece of it. Also the “amaebi no atama,” or the head of the sweet shrimp, can be used for great decorative purposes. You cannot eat these as is, but you can deep-fry them either in a tempura batter or simply on their own.
- The maguro goes on next, toward the back partially against the shiso and daikon. Fish with bold colors like maguro can be in the back but still stand out thanks to its rich color.
- Salmon has a bright color as well and is placed on the other side.
- Lighter-color fish like hamachi is better placed in front of other bold-color fish.
- Tako doesn’t have much color except for the skin, so place it in a way the skin side can be seen.
- Smaller ingredients like uni or ikura are versatile and can be placed really anywhere. In this case the uni is rather large so I placed them all the way in front, which contrasted the colors nicely.
- Spoon the ikura in the center, add some wasabi and ginger, and serve with a side of soy sauce.


[convertkit form=4898799]


Leave a Reply