Love sushi and want to bring some of that spicy tuna roll magic into your kitchen? Well, you’re in luck! Making sushi may seem daunting, but with the right steps, it’s not only doable, it’s fun. In this guide, I’ll walk you through creating two versions of a spicy tuna roll: one with solid tuna and another with chopped tuna for a creamy, spicy mix.
Ready? Let’s get rolling (literally).

❤️Why You'll Love the Spicy Tuna Roll
- The Perfect Flavor Balance - The spicy tuna roll hits that sweet spot between heat and umami. The creamy spiciness of the chili-mayo complements the rich, buttery flavor of the tuna. Add the slight sweetness of sushi rice and the earthy taste of nori, and you’ve got a perfectly balanced bite every time.
- Wide Appeal - Spicy tuna rolls are a crowd-pleaser because they’re approachable for sushi beginners and loved by seasoned sushi eaters alike. For those who might shy away from raw fish, the kick of spice and creamy texture makes the dish feel less “raw” and more indulgent.
- Customizable and Versatile - Spicy tuna rolls are easy to tweak to suit different tastes. Want more crunch? Add tempura crisps or cucumber. Need more spice? Toss in some jalapenos or extra spicy mayo. The roll adapts beautifully to variations, which keeps it exciting for sushi enthusiasts.
Jump to:
🍲Ingredients
Making sushi starts with good prep, and the right ingredients are key. Here’s what you’ll need for two rolls:
Main Ingredients:
- Sushi rice: 1 - 1 ½ cups (200-300g) (check out my sushi rice tutorial if you need help).
- Nori (dried seaweed): 2 half sheets
- Maguro (Tuna): 3-4 oz (85-113g)
- Cucumber (English or Japanese): 4 inches (10cm)
- Green onion: ⅓ of a stalk (chopped)
Flavors and Sauces:
- Spicy mayo: 1 teaspoon (5g) (here’s my video recipe if you want to make it yourself).
- Spicy powder blend: ½ teaspoon (1.4g) Mix 4 parts Korean gochugaru, 1 part cayenne pepper, and 1 part chili powder. You can swap this with Japanese togarashi if you prefer.
- Unagi sauce: A small drizzle for added savoriness. Soy sauce works in a pinch.
- Toasted sesame seeds
Optional Condiments:
- Wasabi, pickled ginger, and soy sauce for serving.
Got everything? Let’s prep!
👩🍳Preparation
Prepping is where the sushi magic begins. Here’s how to get it all ready:
Cucumber
- Peel and cut the cucumber with a katsuramuki technique (thin rotational peeling) if you know how. Or keep it simple and slice it into half-inch wide sticks, cutting out the inner seed section.
Green Onion
- Cut the green onion crosswise into thin slices. Start from the green end for a lighter flavor, or the white end for a stronger one, it’s your call.
Tuna
- For the first roll, leave your tuna in solid form. Cut a piece about ¾-inch thick and either the full length of the nori or split into two halves.
- For the second roll, chop another piece of tuna finely. Aim for a ground, chunky texture, but it’s up to you how fine you want it.
- Transfer the chopped tuna into a bowl and mix it with about 1 teaspoon of spicy mayo, a pinch of spicy powder (adjust to taste), a drizzle of unagi sauce, and the chopped green onion. Mix everything until it’s well combined and creamy.
And just like that, your fillings are ready.
🍣Rolling the Spicy Tuna Rolls
Now for the main event: assembling and rolling. Both rolls are made as uramaki or inside-out rolls, so follow these steps closely.
1: Preparing the Rolling Mat
Wrap your bamboo makisu mat in plastic wrap to keep the rice from sticking. Place it so the bamboo sticks run horizontally, with the flat (greenish) side of the mat on top.
2: Preparing the Nori and Rice
- Place a sheet of nori rough-side-up on the mat, leaving about an inch of space between the nori and the bottom of the mat.
- Wet your hands lightly (use a bowl of cold water to help).
- Grab about an apple-sized ball of rice and evenly spread it across the nori, reaching the edges. Don’t mash the rice—think “gentle pressure.”
- Sprinkle a layer of toasted sesame seeds over the rice, then flip the nori so the rice side is down.
3: Adding Fillings (Solid Tuna Roll)
- Start by sprinkling a light layer of spicy powder across the middle of the nori.
- Lay the solid tuna strips over the spicy powder.
- Add some cucumber for crunch.
4: Rolling It Up
- Lift the bottom edge of the mat with your thumbs while using your fingers to hold the fillings in place.
- Roll the mat over the fillings until the nori wraps around them completely.
- Pull the mat (from the far end) slightly to tighten the roll. You want it firm but not squished.
- Continue rolling the mat until the nori overlaps itself. Press evenly across the roll to seal it.
- Press gently on both ends of the roll to clean up the edges.
5: The Chopped Tuna Roll
Follow the same process for the second roll, but instead of the solid tuna, spoon your spicy tuna mix into the center. Add cucumber strips as before, then roll it up exactly the same way.
🔪Cutting and Plating
Once rolled, it’s time to slice and serve. Here’s how to do it like a pro:
- Wet your sharp knife to prevent sticking.
- Cut each roll in half, then cut each half into quarters for a total of eight even pieces.
- Wipe your knife after every cut (if needed) to keep things clean and precise.
After cutting, it’s time to plate. Arrange the rolls neatly, garnish them with wasabi, pickled ginger, or a sprinkle of extra sesame seeds. Serve with soy sauce on the side for dipping.
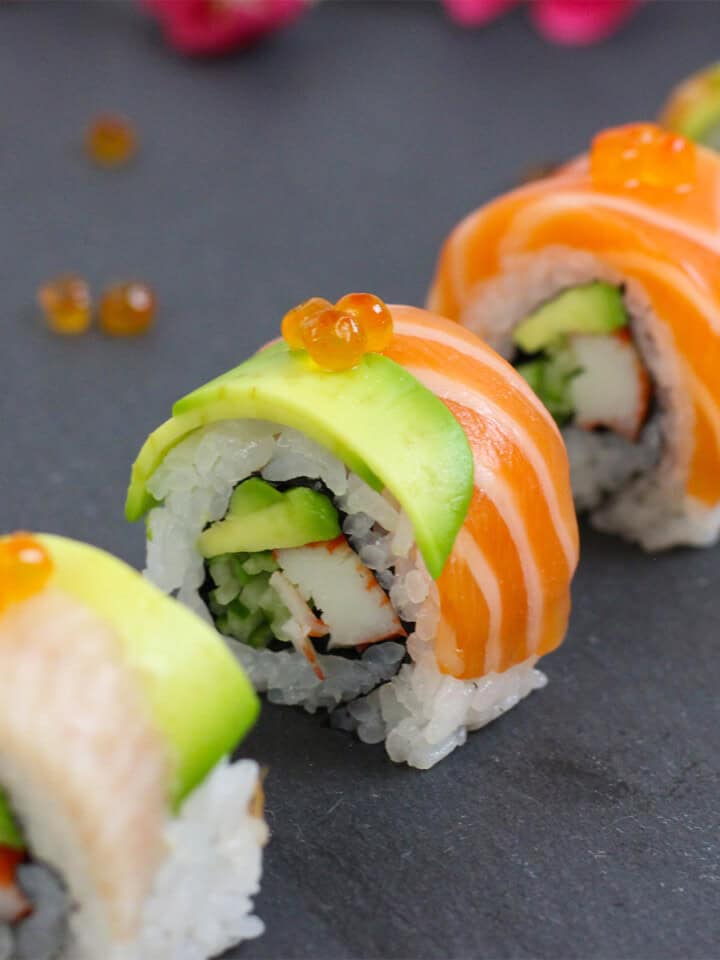
🥑Customize Your Rolls
Feel free to add your own twist to these rolls. Some of my favorite additions include:
- Avocado slices for creaminess.
- Jalapeños for an extra kick.
- Masago or tobiko for a pop of flavor and texture.
The beauty of sushi is that it’s endlessly customizable. Experiment and find what works for you!
🪄Tips and Tricks
- Make sure to wet your hands thoroughly (but not drenched) before touching the sushi rice.
- When flipping the nori and rice, leave about an inch of space from the bottom of the makisu to the bottom of the nori. This leaves just enough space which makes it easier to roll.
- Tighten the roll after the initial wrapping of the fillings by pulling the upper end of the makisu away from you while holding the roll with the other hand.
- Clean and wet the knife right before cutting.
🗒Best served with
- Other Sushi: Since the spicy tuna roll has a bit of heat, it can pair nicely with more mild types of sushi such as a California roll, salmon avocado roll, or an unagi roll for a bit of smokey sweetness.
- Seaweed Salad: The tangy and umami-rich flavors in seaweed salad is always a nice complement to sushi, spicy tuna rolls included.
- Sake: A chilled junmai, a sweeter nigori, or a sparkling sake can go well with the spicy, creamy flavors.
✍️Final Thoughts
And there you have it—two homemade spicy tuna roll recipes that’ll rival your favorite sushi spot. Whether you’re into the clean, simple flavor of solid tuna or the creamy spice of minced tuna, there’s something here for everyone.
Sushi-making might sound intimidating, but with the right tips, it’s very doable. Plus, it’s a great way to impress family and friends! So go ahead, give it a shot, and make sure to check out the other techniques in my videos to expand your sushi skills.
Let me know how your rolls turn out in the comments below. If you enjoyed
🤔Common Questions
I get asked this a lot and I get it, brown rice does have it's great health benefits but I personally would not recommend using it for sushi. Texture is a very important part of sushi and brown rice tends to be too dense and not sticky enough. Traditional white Japanese short grain rice has the perfect consistency and texture. Brown rice also has a earthy flavor to it which can overpower more delicate types of sushi.
Now that said, the best part of making sushi on your own is so that you can make however you like. So by all means, if brown rice is your thing, then go for it. Just know that it may not come out the same.
Yes and no. I know that's not the answer you're looking for but it all depends on the ingredients inside obviously. There are many different versions of the spicy tuna roll so make sure to ask the chef if you're in doubt.
As for my recipes, the one using solid tuna is gluten free. The other with the grounded spicy tuna mix is not, due to the unagi sauce, which contains soy.
Be careful with spicy mayo as well. Kewpie mayo made in the US should be gluten free, however the original ones made in Japan are not. If you live in the States, you'll most likely find US-made Kewpie mayo but just something to be aware of.
Sushi is a very difficult food to keep for later. It needs to be stored in the fridge because of the seafood, but then the sushi rice hardens and gets cold. It's best to eat it as soon as you can but if you have to save it, then make sure to wrap it tightly and keep it in the cooler.
Spicy Tuna Roll (2 Different Styles)
VIDEO
EQUIPMENT
- 1 Makisu (bamboo mat)
- 1 Cutting board
- 1 Knife
- 1 Bowl For cold water to wet hands
- 1 Serving plate
INGREDIENTS
- 1½ cups sushi rice (make ahead)
- 2 half sheet dried seaweed (nori)
- 3-4 ounces fresh tuna (maguro)
- 4 inches cucumber English or Japanese
- ⅓ stalk green onion (chopped)
- ½ teaspoon spicy powder blend (see above for details)
- 1 teaspoon spicy mayo
- unagi sauce (drizzle)
- toasted sesame seeds
- wasabi
- pickled ginger
- soy sauce
INSTRUCTIONS
Preparation
- Gather all ingredients.
- Prepare the cucumber by cutting it into half-inch wide sticks or peel it using the katsuramuki technique.
- Chop green onion into thin slices.
- Cut tuna into ¾ inch thick pieces (for first roll). You'll need about 8 inches in length.
- Chop the remaining tuna until it has a ground, chunky texture.
- Transfer chopped tuna into a bowl. Add 1 teaspoon of spicy mayo, pinch of spicy powder (adjust to taste), a drizzle of unagi sauce, and chopped green onion and mix until well combined.
Preparing the Roll
- Prepare the makisu (bamboo rolling mat) by wrapping it with plastic.
- Lay the makisu down onto a cutting board with the bamboo sticks running horizontally.
- Place a sheet of nori onto the makisu with the rough side up.
- Wet both hands lightly and grab a ball of sushi rice about the size of an apple.
- Spread it across evenly on the nori, making sure to get all the way to the edges and corners.
- Sprinkle some toasted sesame seeds over the rice.
- Flip the nori over so that the rice side is down. Leave about an inch of space from the bottom of the makisu to the bottom of the nori (this makes it easier to roll).
Adding Fillings (Solid Tuna Roll)
- Sprinkle a light layer of spicy powder across the middle of the nori.
- Lay the solid tuna strips and cucumber, all the way across horizontally from one end to the other.
Rolling
- Lift the bottom end of the makisu with your thumbs while holding the fillings in place with your forefingers.
- Bring the mat up and over the fillings until the nori wraps around them completely.
- Pull the makisu from the top (far) end with one hand, while holding the roll in place with the other. This helps tighten the roll so the fillings don't fall out.
- Continue rolling the mat until the nori overlaps onto itself, and then gently apply pressure from all sides using the makisu.
- Press in on the ends of the roll to clean the edges.
The Chopped Tuna Roll
- Follow the same process for the second roll, but instead of the solid tuna, spoon your spicy tuna mix into the center. Add cucumber strips as before, then roll it up exactly the same way.
Cutting and Plating
- Place roll onto the cutting board without the makisu.
- Make sure knife is clean and wet it right before you start cutting.
- Cut the roll right down the center in half first, and then each half into halves again, and now each quarter into halves again. This should total 8 even pieces.
- Arrange the rolls neatly on a plate and add a drizzle of spicy mayo (optional). Serve with some wasabi, pickled ginger, and soy sauce on the side.


Leave a Reply